Garage Storage
How to Organize a Garage
Nine steps in the order that works, each with what it costs. The order matters more than the products: do these out of sequence and you buy things twice.
By Mike M. · Published October 5, 2026
The short answer
- Empty it completely onto the driveway, on a dry day. Cost: nothing, one Saturday.
- Sort into four piles — keep and use often, keep and use seasonally, must be locked, and gone. Cost: nothing.
- Fix the lighting before anything else. A set of linkable LED shop lights, roughly $40-100 for a 2-car bay. Everything after this is easier to do in good light.
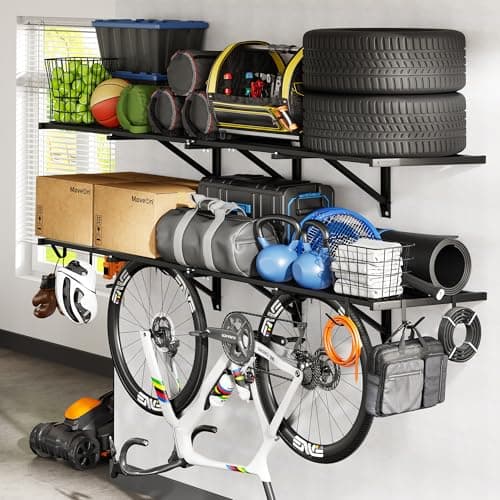
- Put wall shelving on the two best walls. A pair of 2 x 6 ft shelves gives 24 sq ft at zero floor cost — roughly $100-150.
- Add one overhead rack for the seasonal pile, if your joists are 24 in. or less. Roughly $120-190 for 105 cubic feet.
- Standardize on bins, two sizes: small for hardware, 27-gallon lidded totes for overhead. Roughly $50-150.
- Hang the long-handled tools on a rail by the door, and put a pegboard above where the bench will go. Roughly $50-120.
- Buy ONE locking cabinet for chemicals and anything that must be secured. Roughly $90-370.
- Label every bin as you fill it, and put the car back in. Cost: a roll of tape and a marker.
Step 1-2: empty it, then sort it
Non-negotiable, and the step people skip. You cannot plan storage for things you cannot see, and you cannot see how much wall you have while there is a lawnmower against it.
Pick a dry Saturday. Everything out onto the driveway. Then four piles, and be honest about the fourth:
- Often — you use it monthly or more. This goes on walls, at chest height.
- Seasonal — twice a year or less. This goes overhead.
- Locked — chemicals, power tools, anything a child should not reach. This goes in the one cabinet.
- Gone — broken, duplicated, or unused for two years. Deal with it the same day, or it ends up back in the garage.
The sorting is what determines everything you buy. A garage with a huge seasonal pile needs an overhead rack more than shelving. A garage full of hand tools needs wall organization. Buying before sorting is how people end up with cabinets full of things they should have thrown away.
Step 3: lighting first, genuinely
This surprises people and it is the right order. A set of linkable LED shop lights is the cheapest thing on this list and it makes every subsequent step easier — finding studs, reading a tape measure, seeing what is in a bin.
A 400 sq ft two-car garage wants roughly 20,000-30,000 lumens total, which is four 4-ft fixtures at 5,500-7,500 lumens each. They link on one plug, hang on chains, and need no electrician. See the best garage lighting.
Step 4: wall shelving on the best two walls
The single highest-value purchase in the garage. A pair of 2 x 6 ft wall shelves gives you 24 square feet of storage and costs you no floor area at all, with 600 lb per shelf published.
Two practical points. First, check your wall construction — FLEXIMOUNTS shelves cannot mount to metal studs, and the listing says so. Second, use two depths: 24 inches up high for totes, 12 inches at working height above where the bench will go, so you do not hit your head.
See the best garage shelving and, if your walls rule out mounting, wall-mounted vs freestanding shelving.
Step 5: one overhead rack for the seasonal pile
Measure your joist spacing first — center to center between two ceiling joists. At 24 inches or less, every rack works. Above that, only specific models fit exactly 36 or 48 inches.
A 4 x 8 ft rack publishes 750 lb rated (1,200 lb tested) and gives you 105 cubic feet, which is most of a seasonal pile. Store it in lidded totes, because a ceiling is dusty. Details on the best overhead garage storage racks and the install on overhead rack ceiling safety.
Step 6: bins, in exactly two sizes
Small bins for hardware — Akro-Mils 30230 publishes 30 lb each, stack, and hang on louvered panels. And 27-gallon lidded totes for the overhead rack, because they are the size the racks are designed around.
Resist the middle sizes. A medium bin with no defined job becomes a box of unsorted things, which is the problem you started with. See the best garage storage bins.
Step 7: the walls do the rest
Two specific jobs. A rail with sliding hooks by the door for rakes, brooms, shovels and the leaf blower — nothing else handles long-handled tools cleanly. And a pegboard panel at chest height where the bench will go, for the hand tools you reach for constantly.
Metal pegboard, not hardboard: the holes on hardboard fray within a year and hooks start falling out. See the best garage wall organization systems.
Step 8: one cabinet, and only one
By now most of the garage is on walls and ceiling, and what is left is the pile that must be locked — chemicals, fuel, power tools, anything a child should not reach. That is a cabinet's actual job, and one cabinet usually covers it.
Buy one with a published per-shelf rating and anchor it into studs. See the best garage storage cabinets.
Step 9: label it, then park in it
Label every bin as you fill it. Not afterwards — nobody labels 40 bins afterwards. Masking tape and a marker is fine.
Then park the car inside. That is the test: a garage you can park in, where you can find things, is organized. A garage that photographs well and has the car on the driveway is not.
What the first four steps actually need
The four purchases that do most of the work
Wall shelving, one overhead rack and two bin sizes cover steps 4, 5 and 6 — which between them clear more garage than anything else on the list. Lighting comes first and is covered separately.
Shelf plus hanging
FLEXIMOUNTS 2x6 ft Wall Shelves with 8 Hooks (WR26BH-V2)
Double the per-shelf rating of the classic WR26B with hooks thrown in, from the same maker, for less. The newer, better buy of the two.
$129.99Amazon#ad · Price as of October 5, 2026 · Affiliate disclosure for the link to 2x6 ft Wall Shelves with 8 Hooks (WR26BH-V2)
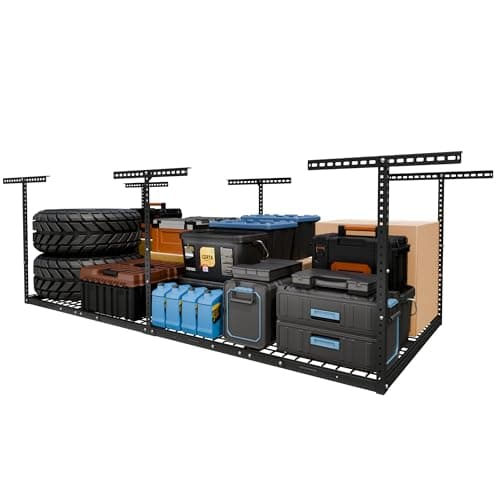
Overhead, done right
FLEXIMOUNTS 4x8 ft Overhead Rack (GR48B)
The overhead rack to buy. Tested and rated figures published separately, brackets that span two joists, and 32 square feet of reclaimed ceiling.
$145.99Amazon#ad · Price as of October 5, 2026 · Affiliate disclosure for the link to 4x8 ft Overhead Rack (GR48B)
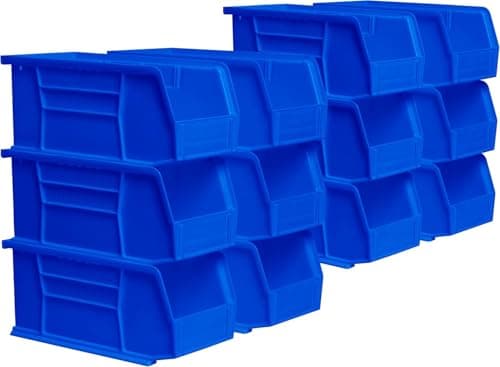
Small parts, properly
Akro-Mils 30230 AkroBins, 11 x 5 x 5 in., 12-Pack
The small-parts bin to standardize on. A published per-bin rating, louvered-panel mounting and real label holders — the only one here that is a system rather than a tub.
$47.88Amazon#ad · Price as of October 5, 2026 · Affiliate disclosure for the link to 30230 AkroBins, 11 x 5 x 5 in., 12-Pack
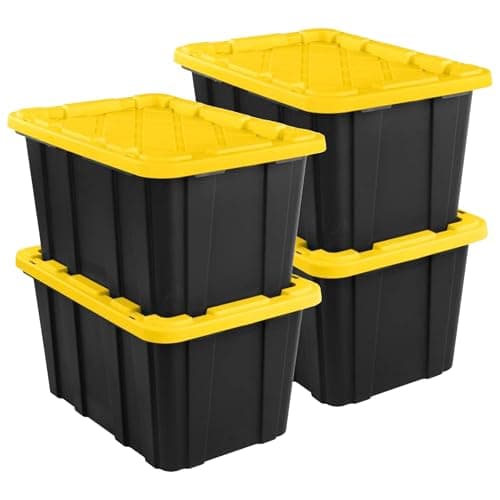
Seasonal storage overhead
Sterilite Industrial Tote with Lid, 27 Gal, 4-Pack (50659Y04)
The lidded tote sized for overhead racks, with tie-down keyholes in the lid. Measure your rack depth: at 28.5 inches these go lengthways only.
$77.99Amazon#ad · Price as of October 5, 2026 · Affiliate disclosure for the link to Industrial Tote with Lid, 27 Gal, 4-Pack (50659Y04)
Why these and not others: the selection criteria for this category.
If your garage is specifically full of tools
The sequence above assumes a mixed garage — bikes, boxes, garden tools, some hand tools. If what you actually have is a garage full of tools and no system, the sorting step is different and the storage is different. Organizing a garage full of tools is the version written for that.
And if you want this costed as a single budget rather than step by step, garage setup under $500 and under $1,000 both follow this same order.
Questions people actually ask
Where do I start organizing a garage?
By emptying it onto the driveway. Every other approach — shuffling things, buying storage first, doing one corner — fails, because you cannot see what you own or how much wall you have while the garage is full. One Saturday, everything out.
What should I buy first?
Light, then walls, then ceiling. Lighting is the cheapest change and makes everything else easier to do. Wall shelving is the cheapest storage per dollar. An overhead rack takes the seasonal boxes. Cabinets come last and you need fewer than you think.
How long does it take to organize a garage?
Two weekends if you are buying as you go: one to empty and sort, one to install after the storage arrives. Doing it in one weekend means installing shelving at nine at night, which is how holes end up in the wrong place.
How much does it cost to organize a garage?
The step-by-step bands below total roughly a few hundred dollars for a genuinely transformed garage if you skip the cabinets and the bench. Garage setup under $500 works through exactly that version, and under $1,000 adds the bench and a cabinet.
What is the most common mistake?
Buying cabinets first. Cabinets are the most expensive storage per cubic foot, they hide things so you forget you own them, and they are only genuinely needed for what must be locked or kept clean. Most garages need one cabinet and a lot of shelving, and buy it the other way round.
Sources
- FLEXIMOUNTS WR26BH-V2 listing — Published 600 lb per shelf across 12 linear feet — the capacity figure behind step 4.
- FLEXIMOUNTS GR48B listing — Published 750 lb rated, 105 cu ft of storage — the capacity behind step 5.
Read next
- The Best Garage ShelvingFreestanding, wire and wall-mounted shelving compared on published per-tier ratings, post thickness and what the install needs.
- The Best Overhead Garage Storage RacksSeven ceiling racks compared on published tested-versus-rated capacity, joist-spacing limits and drop range, including two that lower to you.
- The Best Garage Storage BinsBins and totes compared on published per-bin ratings, lid provision and whether the range is a system you can keep adding to.
- The Best Garage Storage CabinetsEight cabinets compared on published per-shelf ratings, steel thickness and lock type, including the only one with a published warranty.
- The Best Garage Wall Organization SystemsThe whole category ranked together — slatwall, pegboard, rails and powered tool racks — with which wall each belongs on and what it publishes.
- The Best Garage LightingNine fixtures compared on published lumens, calculated efficacy, color temperature and link limits — with the CRI gap stated plainly.
- Garage Setup Under $500The highest usability per dollar: light, wall shelving, a rail, pegboard and bins, with a live running total and nothing on the floor.
- Organizing a Garage Full of ToolsSorting a large tool collection by frequency and weight, then matching each group to the right storage — wall, chest, bin or shelf.