Wall Organization
How to Install Pegboard in a Garage
The difference between a pegboard wall that works for a decade and one whose hooks keep falling out is a 3/4-inch gap behind the panel.
By Mike M. · Published October 5, 2026
The short answer
- Find the studs with a magnet or a stud finder and mark them. Everything else depends on this.
- Set the bench height first if it adjusts, because the board's position is relative to the bench top.
- Check the panel has a standoff flange. If it does not, cut furring strips to create a 3/4 in. gap behind it.
- Dry-fit and level the first panel, marking holes with the panel held in place rather than measuring.
- Use the right fastener for the wall — screws into studs, Tapcon-type into concrete or block.
- Lay the tools out on the floor in the pattern you want before hanging anything.
- Hang most-used tools at chest height in the center and work outward.
The standoff is the whole thing
If you take one thing from this page: pegboard needs a gap behind it. About 3/4 inch. Without it, your hooks will not hold properly and you will spend years picking tools up off the floor.
The reason is the hook's geometry. A pegboard hook has a front leg that goes through the hole and bears the load, and a rear leg that reaches behind the panel to stop the hook rotating. With a 3/4-inch gap, that rear leg sits against the panel's back face and the hook is locked. Mount the panel flat against the wall and the rear leg has nowhere to go — so the hook holds only by friction, and the first time you lift a tool off, it tips.
Wall Control's panels have a pre-formed 3/4-inch flange that creates this gap automatically, which is most of why they cost more than the alternatives. If your panel does not have one — Ultrawall and Spampur do not mention one — you create it with furring strips: 1x2 lumber screwed to the studs, then the panel screwed to the lumber.
Find the studs, properly
A loaded pegboard wall is heavier than people expect: the panel, the hooks, the bins, the tools. Into studs, not into drywall.
Three ways, in order of reliability. An electronic stud finder, which is quick and occasionally lies. A strong magnet dragged across the wall, which finds the drywall screws and therefore the studs, and never lies. Or measuring from a corner at 16-inch intervals and checking with a small nail hole where the panel will cover it.
Mark the stud centers with a pencil line from floor to ceiling, so you still know where they are once the panel is held against the wall.
If the wall is concrete or block
Many garages have at least one masonry wall, and this is where the right fastener matters. Wall Control's galvanized listing names it specifically: blue Tapcon screws or equivalent.
The method: masonry bit in a hammer drill, drill to slightly deeper than the screw length, blow or vacuum the dust out of the hole (this is the step people skip and it is why the screw strips), then drive the screw without over-torquing. A Tapcon in clean concrete holds far more than anything the panel will put on it.
What not to use: plastic expansion plugs. They are for drywall, they work loose in masonry under vibration, and a garage has plenty of vibration.
Height: bench first, board second
The board's position is relative to the bench, not to the floor. So if the bench adjusts — and several of the benches in the main roundup adjust across ten or more inches — set it to the height you will actually use before you drill anything.
Then: bottom edge of the board at or just above the bench top, extending up to roughly shoulder height. The band between chest and shoulder is where your hands naturally go, so that is where the tools you use most should live.
Going higher than shoulder height is tempting and mostly wasted — you will stop reaching up there and those hooks will stay empty. The height arithmetic for the bench itself is on garage workbench height.
Dry-fit, do not measure
Measuring hole positions from a drawing and transferring them to a wall is how panels end up a quarter-inch off. Hold the panel against the wall instead, level it, and mark through the actual holes.
For a multi-panel wall, level the FIRST panel obsessively — every subsequent panel references it, and pegboard holes make a small error visible across a whole wall because the rows no longer line up. FLEXIMOUNTS-style mounting templates do not exist for pegboard; a long level and patience do the job.
One panel at a time, fully fixed, before the next.
Lay the tools out before you hang them
The most common regret is hanging tools in the order you took them out of the drawer, then discovering the thing you reach for forty times a day is in the bottom corner.
Lay everything on the floor in the pattern you want, in the shape of the board. Then hang from the center outward:
- Chest height, center — screwdrivers, pliers, tape measure, the things you touch every visit.
- Shoulder height — less-used hand tools, clamps, levels.
- Bench level and below — bins for fasteners, so you can see into them. Accessory kits with bins are covered on pegboard hooks and accessories.
- Edges — the things you use monthly.
What to buy
Panels with a standoff, plus the accessories to fill them
The two Wall Control packs build the standoff in, which is the install problem this page is mostly about. INCLY's kit is the budget route — twelve square feet and 234 accessories — and needs furring strips behind it.
Pegboard that lasts
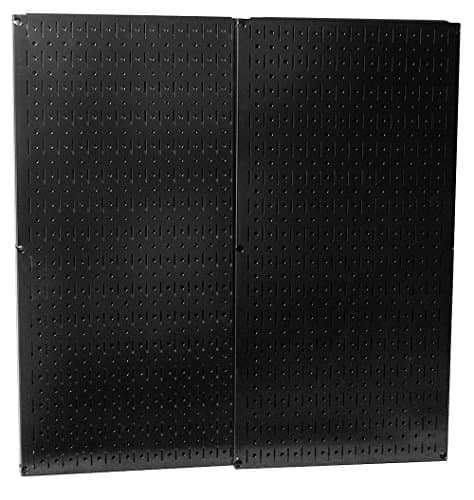
Wall Control Metal Pegboard Pack, 2 x (32 x 16 in.) (30-P-3232B)
The pegboard worth buying. The pre-formed flange and steel holes are why your tools still hang straight in five years, and it takes generic pegs too.
$51.29Amazon#ad · Price as of October 5, 2026 · Affiliate disclosure for the link to Metal Pegboard Pack, 2 x (32 x 16 in.) (30-P-3232B)
Damp or unheated garages
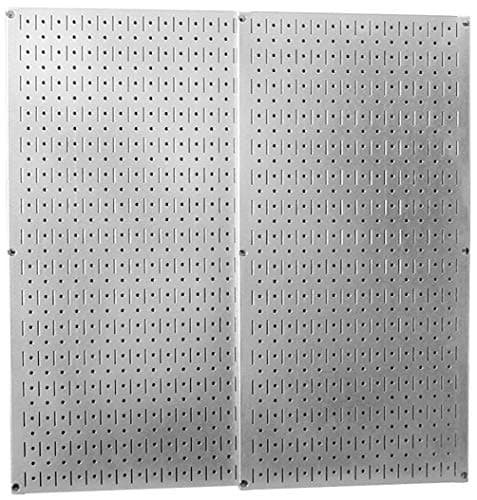
Wall Control Galvanized Steel Pegboard Pack (30-P-3232GV)
The same Wall Control panel in galvanized steel for less money. Buy this one for a cold, damp garage and the black for a finished-looking wall.
$42.28Amazon#ad · Price as of October 5, 2026 · Affiliate disclosure for the link to Galvanized Steel Pegboard Pack (30-P-3232GV)
A whole wall in one box
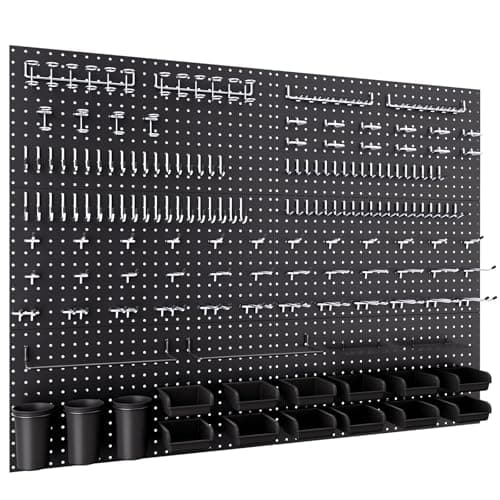
INCLY 48 x 36 in. Metal Pegboard Kit with 234 Accessories
The most complete pegboard purchase here: twelve square feet, 234 accessories, and hooks with the double pegs that stop them swinging out.
$109.99Amazon#ad · Price as of October 5, 2026 · Affiliate disclosure for the link to 48 x 36 in. Metal Pegboard Kit with 234 Accessories
Filling a board properly
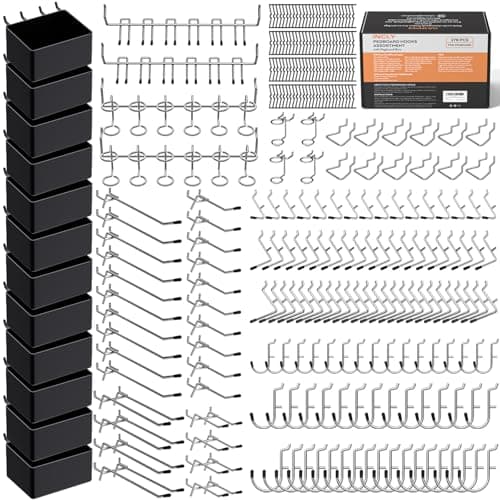
INCLY 278-Piece Pegboard Accessory Kit
The kit to buy with a board, because it includes the peg locks that bridge 1/8-inch hooks to a 1/4-inch board. Twelve bins is what makes it more than hooks.
$25.99Amazon#ad · Price as of October 5, 2026 · Affiliate disclosure for the link to 278-Piece Pegboard Accessory Kit
Why these and not others: the selection criteria for this category.
Next
The panel comparison is on the best pegboard for a garage, and the accessory kits — including the peg locks that bridge 1/8-inch hooks to a 1/4-inch board — on pegboard hooks and accessories.
For the rest of the wall, garage wall organization ideas covers what goes where.
Questions people actually ask
Does pegboard need a gap behind it?
Yes, about 3/4 inch, and it is the single most important thing about installing pegboard. A hook's rear leg needs somewhere to sit behind the panel; mount a panel flat to the wall and the hook can only grip by friction in the hole, and under load it tips out. Wall Control builds the standoff in; other panels need furring strips.
How do I mount pegboard to a concrete or block garage wall?
With masonry fasteners — Wall Control's listing names blue Tapcon screws or equivalent, which is exactly the right answer. Drill with a masonry bit, keep the holes clean, and do not over-torque. Plastic plugs are for drywall, not for a loaded panel on block.
What height should pegboard be?
Bottom edge at or just above the bench top, extending up to about shoulder height. The tools you use most should fall between chest and shoulder. If the bench is height-adjustable, set the bench to its working height FIRST, then mount the board.
Can I screw pegboard straight into drywall?
For a light panel holding hand tools, with proper drywall anchors, it will hold. For a fully loaded board it will not, and the failure takes a chunk of wall with it. Find the studs — it takes ten minutes and a magnet.
How do I lay out the tools?
Trace them on the board, or lay them on the floor in the pattern you want first. The common mistake is hanging tools in the order you unpack them and then finding the thing you use hourly is in the corner. Most-used in the center at chest height, outward from there.
Sources
- Wall Control metal pegboard listing — Published pre-formed 3/4 in. flange that separates the panel surface from the wall.
- Wall Control galvanized pegboard listing — Names blue Tapcon screws or equivalent as the recommended fastener for concrete.
Read next
- The Best Pegboard for a GarageMetal pegboard panels and kits compared on the standoff flange, hole-size compatibility and whether accessories are included.
- Will Pegboard Hooks Work on Slatwall?Why pegboard hooks do not fit slatwall, what bridges them, and the 1/8-versus-1/4-inch hole trap that catches people within pegboard.
- Slatwall vs PegboardA decision table across load rating, cost, install difficulty and reconfigurability, then which wall each system belongs on.
- Garage Wall Organization IdeasA wall-by-wall layout plan — what belongs at which height, which system suits each wall, and the three ideas that waste a wall.
- What Height Should a Garage Workbench Be?A three-row table of recommended bench heights by task, the measurement to take, and the benches whose published range covers it.
- The Best Garage WorkbenchesEight benches compared on published capacity, top material and depth — including why a 220 lb rating can be more honest than a 2,500 lb one.